Raspberry Pi Tutorials
(work in progress)
A. How to mount a USB hard drive
1. First, plugin and then locate the drive:
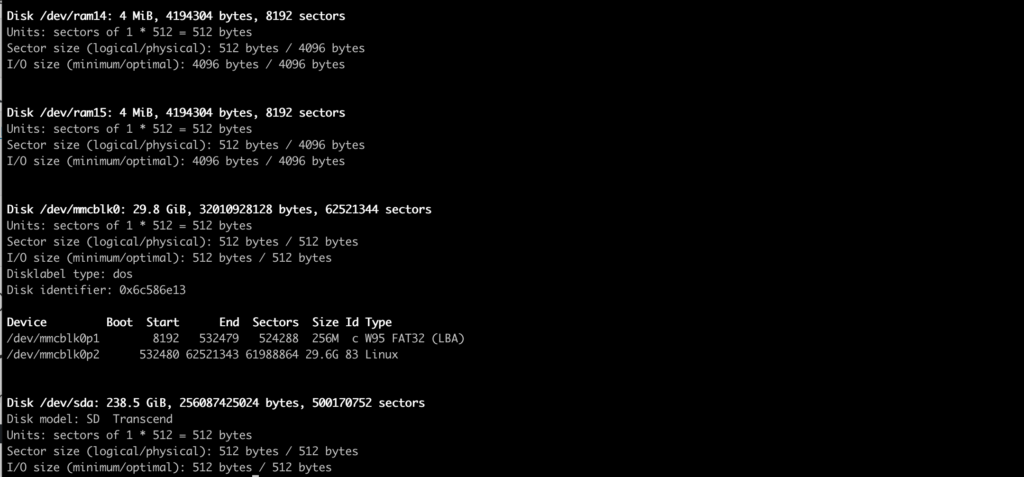
sudo fdisk -l
In this example output, I mounted a 256GB SD CARD with the help of a USB adapter:
2. Created a mounted location:
sudo mkdir /media/backup-drive
3. Prepare the SD CARD partition
Warning: this will wipe all data on card!
Identify the device name and run the following command:
sudo mkfs.ext4 /dev/sda
4. Mount the card
Change this command according to your device name and the folder that you created:
sudo mount /dev/sda /media/backup-drive
5. Change user ownership
Change user ownership to allow pi to access the drive:
sudo chown pi:pi backup-drive
6. Find the disk ID
Type the following command:
sudo lsblk -o UUID,NAME,FSTYPE,SIZE,MOUNTPOINT,LABEL,MODEL
Expected output:

If your storage device uses an NTFS file system, you will have read-only access to it. If you want to write to the device, you can install the ntfs-3g driver:
sudo apt update
sudo apt install ntfs-3g
7. confirm the device name
Type:
sudo blkid
Expected result:

8. Setup automatic mounting
Once PI is restarted, you want the device to automatically get mounted. Open the fstab file:
sudo nano /etc/fstab
And add to it a line in the following format:
[Device] [Mount Point] [File System Type] [Options] [Dump] [Pass]
For our case, it is:
UUID=5f4bccbc-1fbe-4400-bd3e-a1473c65f501 /media/backup-drive ext4 defaults,auto,users,rw,nofail 0 0
If the filesystem type is FAT or NTFS, add ,umask=000 immediately after nofail – this will allow all users full read/write access to every file on the storage device.
Note: if you do not have the storage device attached when the Pi starts, the Pi will take an extra 90 seconds to start up. You can shorten this by adding ,x-systemd.device-timeout=30 immediately after nofail. This will change the timeout to 30 seconds, meaning the system will only wait 30 seconds before giving up trying to mount the disk.
B. Change hostname
The device hostname is determining how it looks on the network (specifically, when you login to your router) so if you have got more than one raspi in your network, it will be better to identify them with unique names.
Open nano and edit /etc/hosts:
sudo nano /etc/hosts
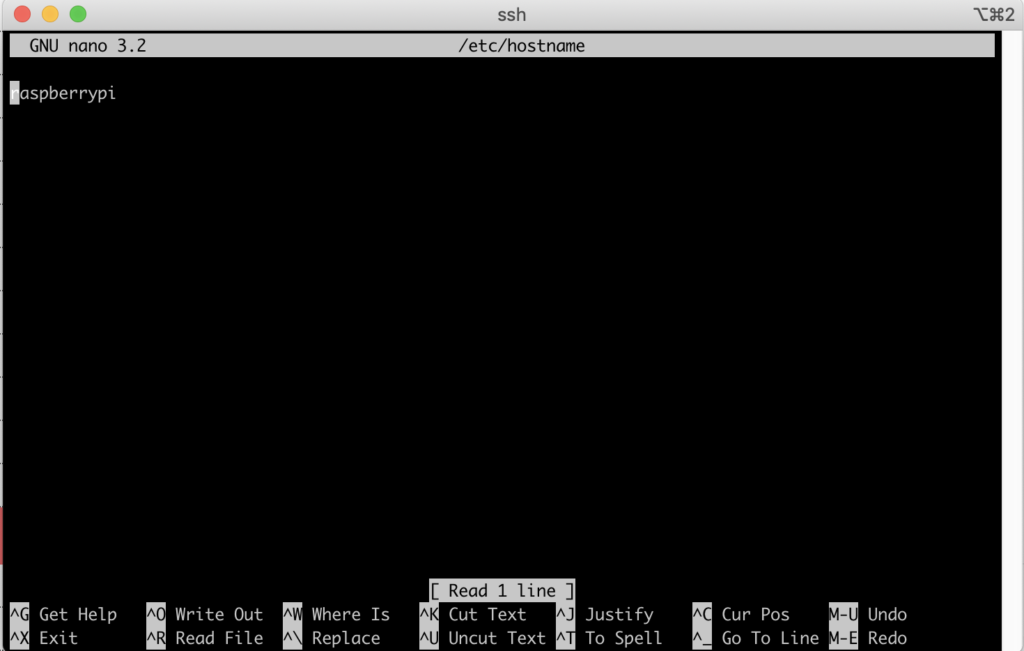
And change the name to your favorite name, say raspi-backup1
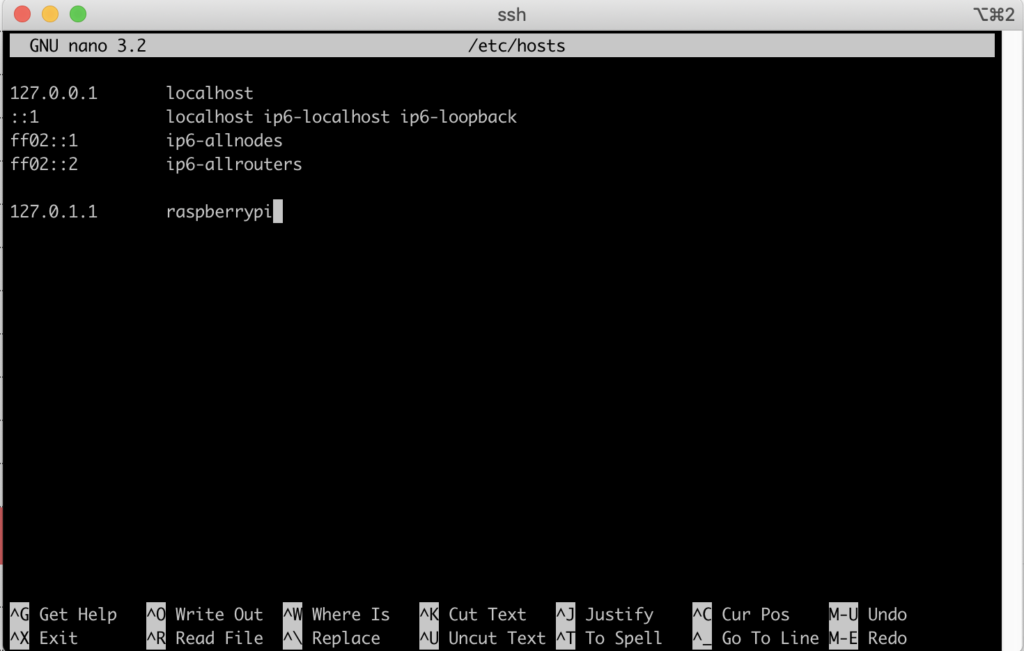
And do the same in /etc/hosts – change all the raspberrypi names to your name:
sudo nano /etc/hosts
Save the files and reboot the device:
sudo reboot